 |
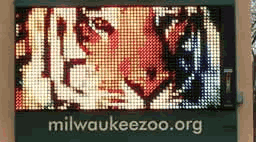
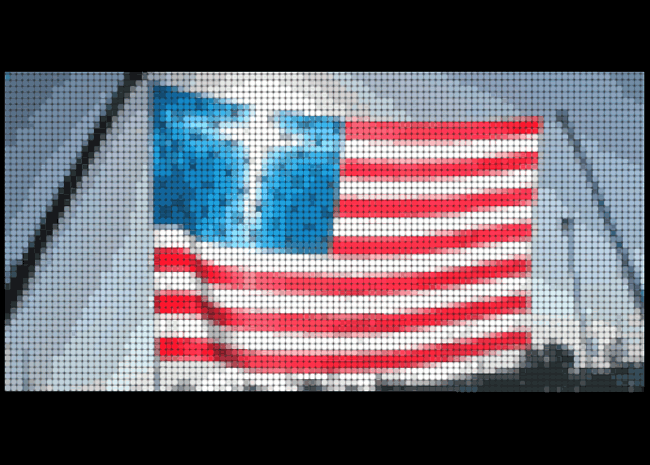
We are going to mimic this effect by adding what I call luminance stepping. |
- int "luminanceSteps" - a value which specifies how many shades of color will be displayed. The higher this is the closer the picture will get, in terms of color, to the original.
- float "luminanceBoost" - a value that boosts the brightness of each pixel region. Useful for when pictures get darker as a result of these effects or any other time you want to brighten the LED display. It is very useful for distinguishing between a day-time and night-time scene. Generally during the day LED screens don't seem as bright because your eyes are adjusted to day time light. Conversely, they seem brighter at night. As your scene progresses from day to night you could increase this value to get a nice effect! (Take a look at the day and night presets in the Led Shader Demo)
What is Luminance Stepping?
I call it luminance stepping because we aren't actual discretizing the colors we are working with directly. Instead, we calculate the luminance (or light intensity) of the pixel region color. We also calculate the ratio of each color channel to it's color's total luminance. Then, we calculate a luminance bin that the color falls into. Finally, we use the value of that luminance bin, as well as the ratio mentioned to assemble a new shade of color. By using the ratio of the original color channels to the old luminance value, we maintain hue while changing luminance! This whole process discretizes the luminance of the color thus limiting the shades of each color displayed.
 |
To the left I have provided the luminance steps for the colors of white (all colors) and pure red just as an example. The colors on the left could be produced on a billboard using a luminance step of 7 because there are 7 luminance bins (or shades). There are still many colors that can be produced because this method does not limit color combinations in any way (varying levels of red, green, and blue). But it does limit color overall because it limits the shades a color can have. It's one way we can mimic the effect of LED screens that have limited color capabilities (In Led Shader Tutorial - Part IV, we will see another method for enhancing this effect). I found that a luminance step of 12 looked very nice on my pictures. |
 |
Well lets look at this luminance function:
vec4 applyLuminanceStepping(in vec4 color)
{
    float sum = color.r + color.g + color.b;
    float luminance = sum/3.0;
    vec3 ratios = vec3(color.r/luminance, color.g/luminance, color.b/luminance);

    float luminanceStep = 1.0/float(luminanceSteps);
    float luminanceBin = ceil(luminance/luminanceStep);
    float luminanceFactor = luminanceStep * luminanceBin + luminanceBoost;

    //use ratios * luminanceFactor as our new color so that original color hue is maintained
    return vec4(ratios * luminanceFactor,1.0);
}
It takes a color as input and returns the altered color. Let's go through the code step by step.
First, we take the sum of the colors and then we divide it by three to get our luminance. Yes, this is simply the average of the colors, but if you think about it also represents the amount of luminance the color has. Full luminance would be the color white which is rgb values of (1.0,1.0,1.0). So when you add the colors of white together you get 3. White, according to this method, indeed has a luminance of 1.0 (or 100%).
Next, we compute the ratios of each color channel to this luminance value. This tells us how much each channel is contributing to its color's luminance value. We will need this later in calculating our new color because we want to change the shade of the color not its hue.
Now we can figure out which luminance bin we fit into. We take the inverse of our luminanceSteps variable to give us our luminanceStep which essential tells us how far each bin jumps in the luminance spectrum. If you don't understand all that just think of it in these terms. As luminanceSteps goes up our luminanceStep will be smaller which means more luminance bins and more shades of color.
Our bin is determined by the ceiling of (luminance/luminanceStep). I chose the ceiling function instead of the floor function because I'd rather err on the side of boosting the luminance rather than dampening it. I think this is reasonable since LED displays are naturally bright.
The product of luminanceBin and luminanceStep gives us a luminanceFactor that tells us how much luminance our new color will have. We also add in our luminanceBoost at this point. The variable adds some light to the the new color. This will make the whole picture brighter.
With this luminanceFactor and our stored ratios we have what we need for our new color. Each color channel maintains it's ratio to the overall luminance of the color! In this way we have discretized the shade of all our colors while maintaining their hue.
Conceptual summary of shader steps for each fragment (The current fragment being processed is referred to in the first person):
- compute base case sample locations in texture coordinates
- find out which pixel region I am in and apply that offset to the base case to get my sample locations
- use texture coordinates I have computed to get 9 color values from my pixel region
- store the average of those color values
- modify this color's shade by passing it to the applyLuminanceStepping function
- determine where I am in relation to the circle defining my pixel region
- use tolerance uniform and my position to get a gradient coeffecient
- I get assigned a blending of my pixel region color and dark gray based on the gradient coeffecient
Go to LED Shader Tutorial - Part IV for a look at improving this technique!
The code (if you are going to use the code you should refer to the Source and Demo page):
void main (void)
{
    gl_TexCoord[0] = gl_MultiTexCoord0;
    gl_Position = ftransform();
}

/*************************************************************
*Shader by: Jason Gorski
*Email: jasejc 'at' aol.com
*CS594 University of Illinios at Chicago
*
*LED Shader Tutorial
*For more information about this shader view the tutorial page
*at http://www.lighthouse3d.com/opengl/ledshader or email me
*************************************************************/

#define KERNEL_SIZE 9

uniform int pixelSize; //size of bigger "pixel regions". These regions are forced to be square
uniform ivec2 billboardSize; //dimensions in pixels of billboardTexture
uniform sampler2D billboardTexture; //texure to be applied to billboard quad

//uniforms added since billboard1

//a tolerance used to determine the amount of blurring along the edge of the circle defining our "pixel region"
uniform float tolerance;
//the radius of the circle that will be our "pixel region", values > 0.5 hit the edge of the "pixel region"
uniform float pixelRadius;

//uniforms added since billboard2

//number of shades of color our LED billboard will display
uniform int luminanceSteps;
//used to brighten or darken image
uniform float luminanceBoost;

vec2 texCoords[KERNEL_SIZE]; //stores texture lookup offsets from a base case

//apply luminanceSteps & luminanceBoost
vec4 applyLuminanceStepping(in vec4 color)
{
     float sum = color.r + color.g + color.b;

     //brightness or luminance of color
     float luminance = sum/3.0;

     //ratio stores each channel's contribution to the luminance
     vec3 ratios = vec3(color.r/luminance, color.g/luminance, color.b/luminance);

     float luminanceStep = 1.0/float(luminanceSteps); //how big each luminance bin is
     float luminanceBin = ceil(luminance/luminanceStep); //figure out which bin the color is in

     //store the luminance of the color we are making including luminanceBoost
     float luminanceFactor = luminanceStep * luminanceBin + luminanceBoost;

     //use ratios * luminanceFactor as our new color so that original color hue is maintained
     return vec4(ratios * luminanceFactor,1.0);
}

void main(void)
{
     //will hold our averaged color from our sample points
     vec4 avgColor;

     //width of "pixel region" in texture coords
     vec2 texCoordsStep = 1.0/(vec2(float(billboardSize.x),float(billboardSize.y))/float(pixelSize));

     //x and y coordinates within "pixel region"
     vec2 pixelRegionCoords = fract(gl_TexCoord[0].st/texCoordsStep);

     //"pixel region" number counting away from base case
     vec2 pixelBin = floor(gl_TexCoord[0].st/texCoordsStep);

     //width of "pixel region" divided by 3 (for KERNEL_SIZE = 9, 3x3 square)
     vec2 inPixelStep = texCoordsStep/3.0;
     vec2 inPixelHalfStep = inPixelStep/2.0;

   //use offset (pixelBin * texCoordsStep) from base case
     // (the lower left corner of billboard) to compute texCoords
     float offset = pixelBin * texCoordsStep;

     texCoords[0] = vec2(inPixelHalfStep.x, inPixelStep.y*2.0 + inPixelHalfStep.y) + offset;
     texCoords[1] = vec2(inPixelStep.x + inPixelHalfStep.x, inPixelStep.y*2.0 + inPixelHalfStep.y) + offset;
     texCoords[2] = vec2(inPixelStep.x*2.0 + inPixelHalfStep.x, inPixelStep.y*2.0 + inPixelHalfStep.y) + offset;
     texCoords[3] = vec2(inPixelHalfStep.x, inPixelStep.y + inPixelHalfStep.y) + offset;
     texCoords[4] = vec2(inPixelStep.x + inPixelHalfStep.x, inPixelStep.y + inPixelHalfStep.y) + offset;
     texCoords[5] = vec2(inPixelStep.x*2.0 + inPixelHalfStep.x, inPixelStep.y + inPixelHalfStep.y) + offset;
     texCoords[6] = vec2(inPixelHalfStep.x, inPixelHalfStep.y) + offset;
     texCoords[7] = vec2(inPixelStep.x + inPixelHalfStep.x, inPixelHalfStep.y) + offset;
     texCoords[8] = vec2(inPixelStep.x*2.0 + inPixelHalfStep.x, inPixelHalfStep.y) + offset;

     //take average of 9 pixel samples
     avgColor = texture2D(billboardTexture, texCoords[0]) +
                         texture2D(billboardTexture, texCoords[1]) +
                         texture2D(billboardTexture, texCoords[2]) +
                         texture2D(billboardTexture, texCoords[3]) +
                         texture2D(billboardTexture, texCoords[4]) +
                         texture2D(billboardTexture, texCoords[5]) +
                         texture2D(billboardTexture, texCoords[6]) +
                         texture2D(billboardTexture, texCoords[7]) +
                         texture2D(billboardTexture, texCoords[8]);

     avgColor /= float(KERNEL_SIZE);

     //get a new color with the discretized luminance value
     avgColor = applyLuminanceStepping(avgColor);

     //blend between fragments in the circle and out of the circle defining our "pixel region"
     //Equation of a circle: (x - h)^2 + (y - k)^2 = r^2
     vec2 powers = pow(abs(pixelRegionCoords - 0.5),vec2(2.0));
     float radiusSqrd = pow(pixelRadius,2.0);
     float gradient = smoothstep(radiusSqrd-tolerance, radiusSqrd+tolerance, powers.x+powers.y);

     gl_FragColor = mix(avgColor, vec4(0.1,0.1,0.1,1.0), gradient);
}
| [Previous: part II] | [Next: part IV] |
